Slideshow on TV with Raspberry PI
Sad backstory
For years now, I was using AppleTVs, FireTVs and even Windows PCs (originally meant for gaming) to display recent and ancient family photos.
Recently however the FireTV we were using started acting weird. Firstly it did not iterate all photos (over 11.000 of them). After its last firmware only the most recent files (100 or 200 of them) were shown. Secondly the quality of the photos saw a dramatic decrease there were artifacts of jpg compression, that I obviously did not put there.
In order to solve this issue, I used a Raspberry Pi …
Happy ending (how-to)
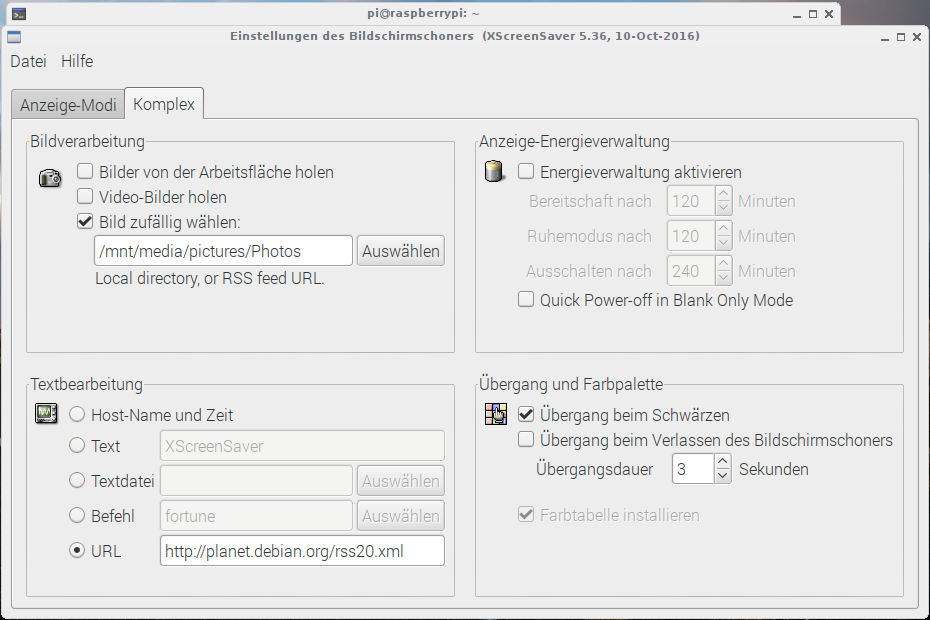
First things first: Where are the photos? All my photos are placed on my nextcloud-server. I created a samba share on the server, to access the photos from the raspberry pi. To access the photos, I setup the following entry in the /etc/fstab
//192.168.0.159/3tb /mnt cifs user=kaiwegner,password=**,nounix,iocharset=utf8 0 0
Be sure to install smbclient in order to be able to mount samba shares:
$ sudo apt-get install smbclient
In order to be able to mount this share automatically, we need to change some configurations on the raspberry.
$ sudo raspi-config
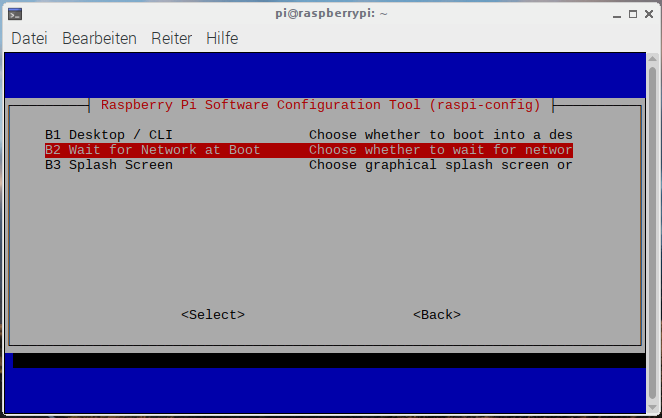
In “Boot Options” enable “Wait for Network at Boot”
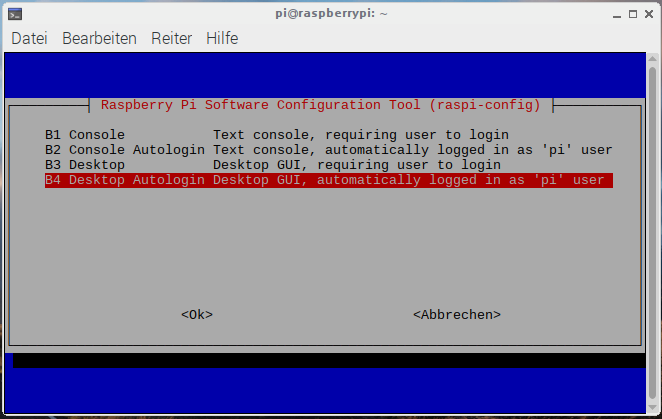
In “Boot Options” -> “Desktop /CLI” select “Desktop Autologin”
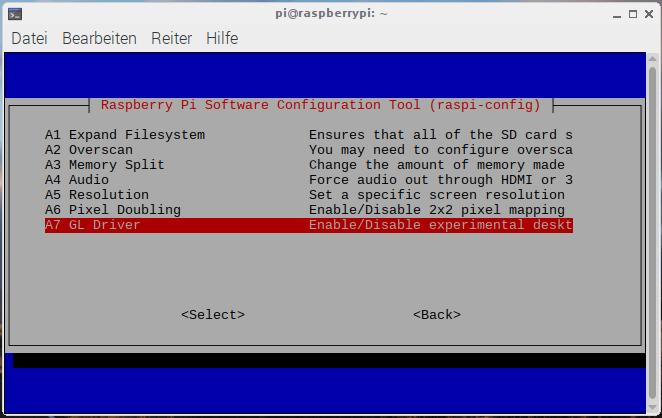
In “Advanced” enable the “GL Driver” Option to enable hardware acceleration
Now we need two packages to make this work:
$ sudo apt-get install xscreensaver xscreensaver-gl-extra
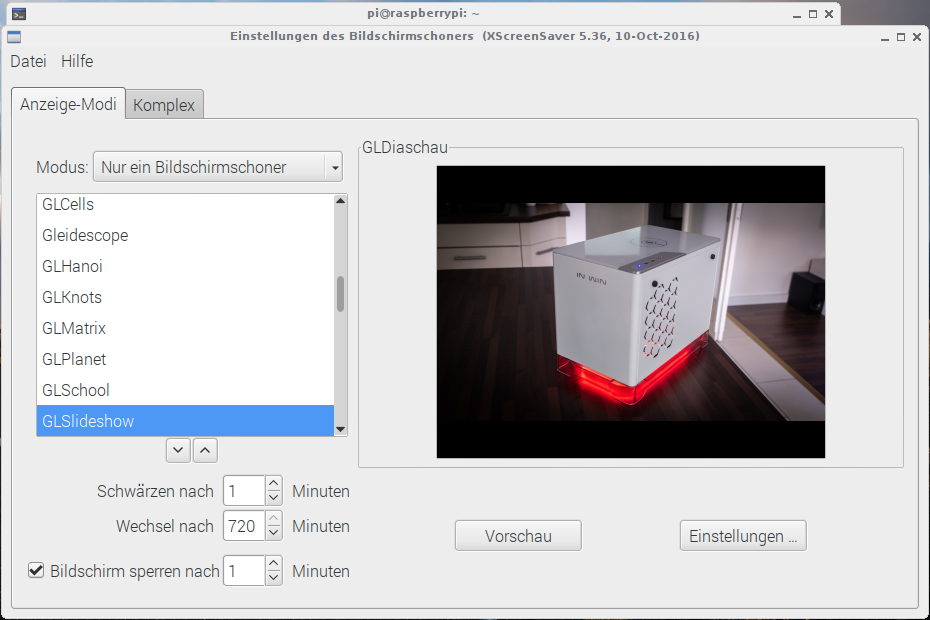
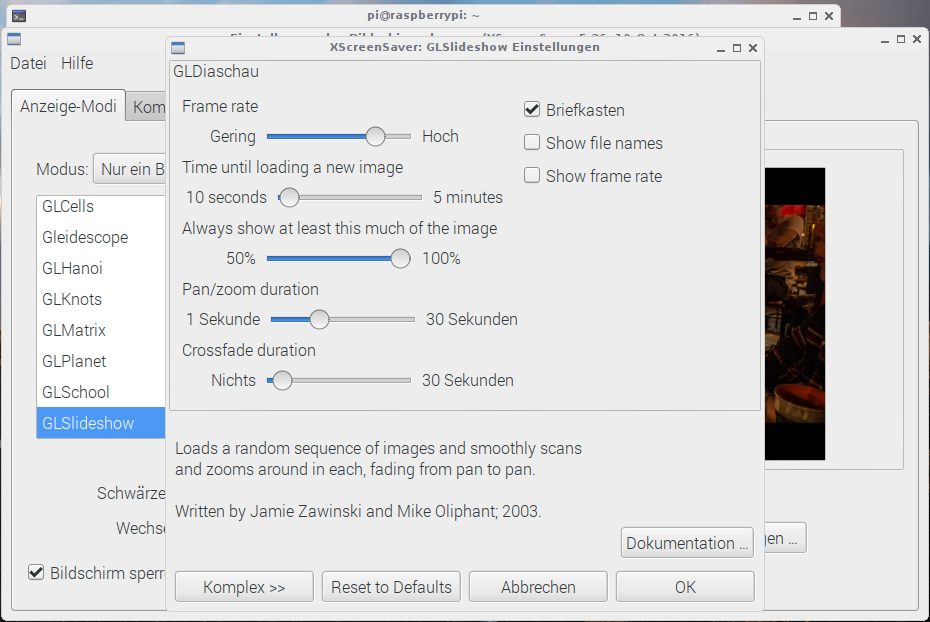
On the Raspbian Desktop open a terminal and run xscreensaver-demo. Where we can then select the screensaver “GLSlideshow”.
Now the last piece in the puzzle is to automatically start the screensaver after boot. This is done through the autostart config file of lxde:
$ nano /etc/xdg/lxsession/LXDE-pi/autostart

Add the following two lines:
@xscreensaver -no-splash
@screensaver-command -activate
The first command will launch the screensaver deamon on the desktop. The second command will instantly activate the screensaver. voila!
Connected to the TV USB- and HDMI-Ports, the Raspberry will boot as soon as the TV is turned on. Only 10-20 seconds later, we can see our photos smoothly fading on the TV.